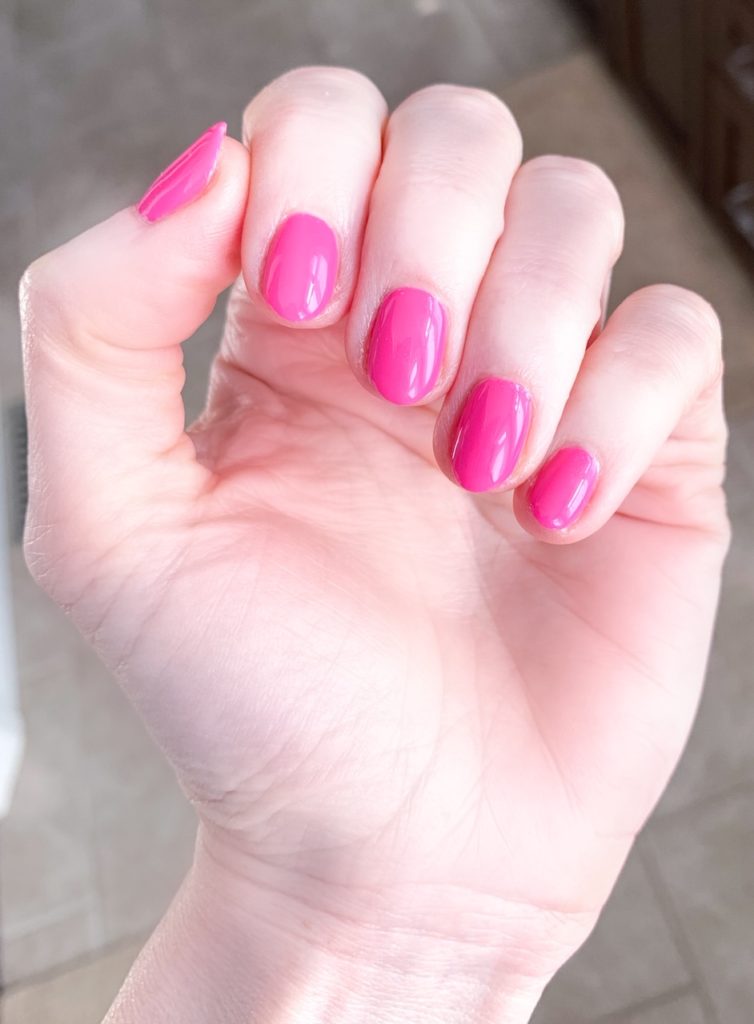
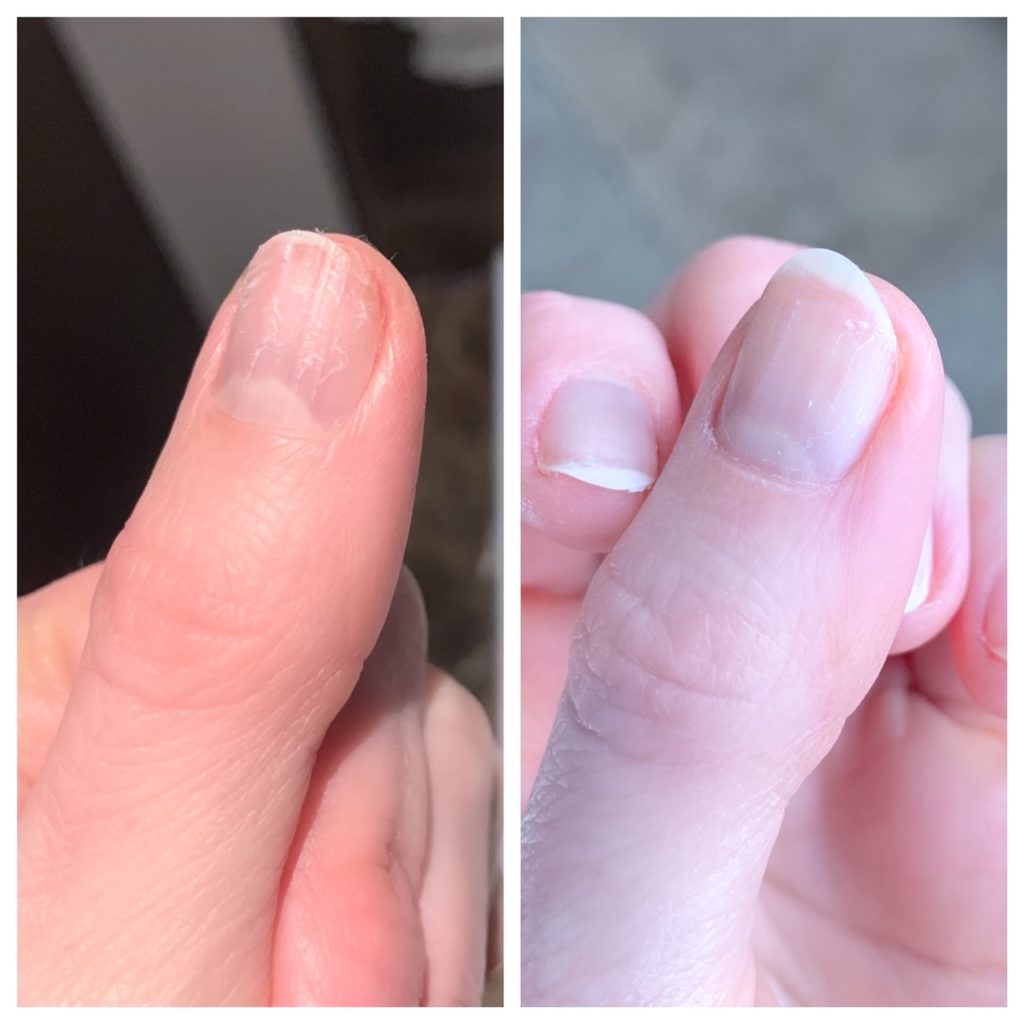
I am a Do-It-Your-Selfer when it comes to much of my Beauty Maintenance. Mostly because I have control issues, and I find I do just as good of a job if not better, doing it my own way. My body has been tugging at me to give up the gel nails, AKA Shellac, for some time. I hated how sensitive my nails were when they were in between gel polish applications. They also seemed to be getting more brittle by the day. I really had no idea how thin my nails had actually gotten until I gave them a break for a couple of months. See before and after pics as well as Step by Step Instructions for your Salon Manicure at home!
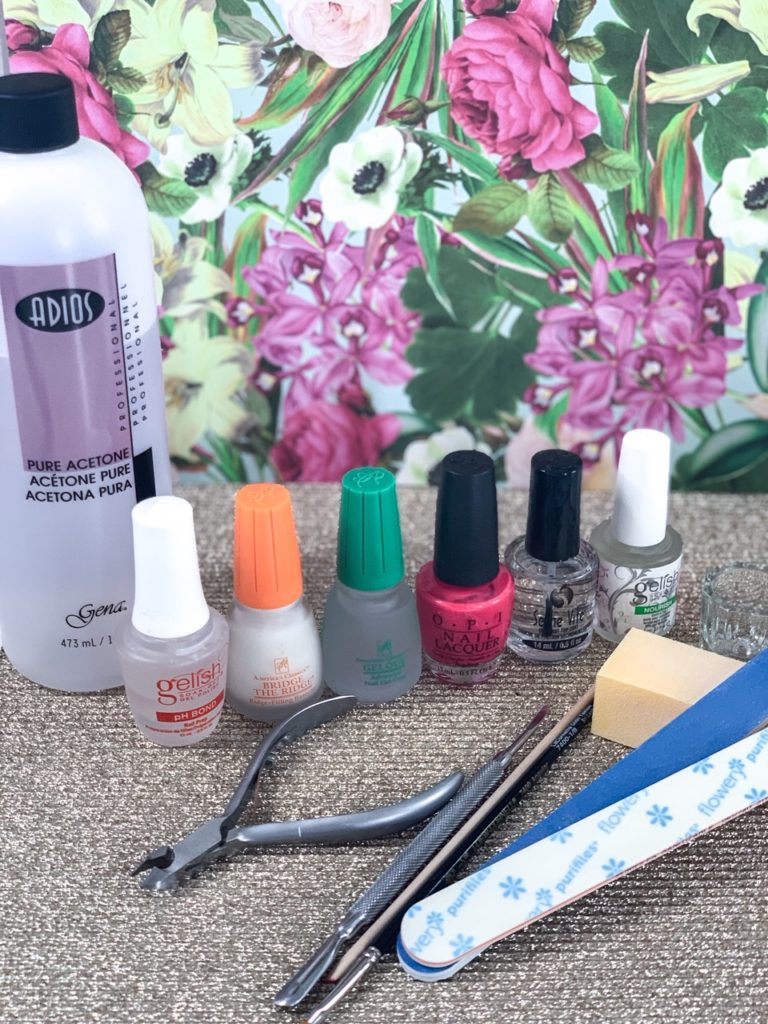
From Left to Right: Acetone (similar) // Gelish pH Bond // American Classics Bridge The Ridge // American Classics Gelous Base Coat // OPI My Chiuauua Bites // Seche Vite Fast Dry Top Coat // Gelish Nourish Nail Oil
Tools: Cuticle Nipper // Metal Cuticle Pusher // Orange Wood Sticks // Fine Nail Buffer (better) // Nail File (nice set) // Detail Cleanup Brush Set
Here are the Step By Step Instructions. This process takes me about an hour. Remember to be patient with yourself. Practice Makes Perfect 🙂
Step 1 ~ Remove any polish
Step 2 ~ Push back cuticle with Metal Cuticle Pushers. Trim any cuticles as necessary.
Step 3 ~ Shape nails as desired
Step 4 ~ Use yellow buffer block and lightly buff once over
Step 5 ~ Wash hands and scrub nail with an old toothbrush or scrub brush
Step 6 ~ Apply light application of Gelish pH Bond
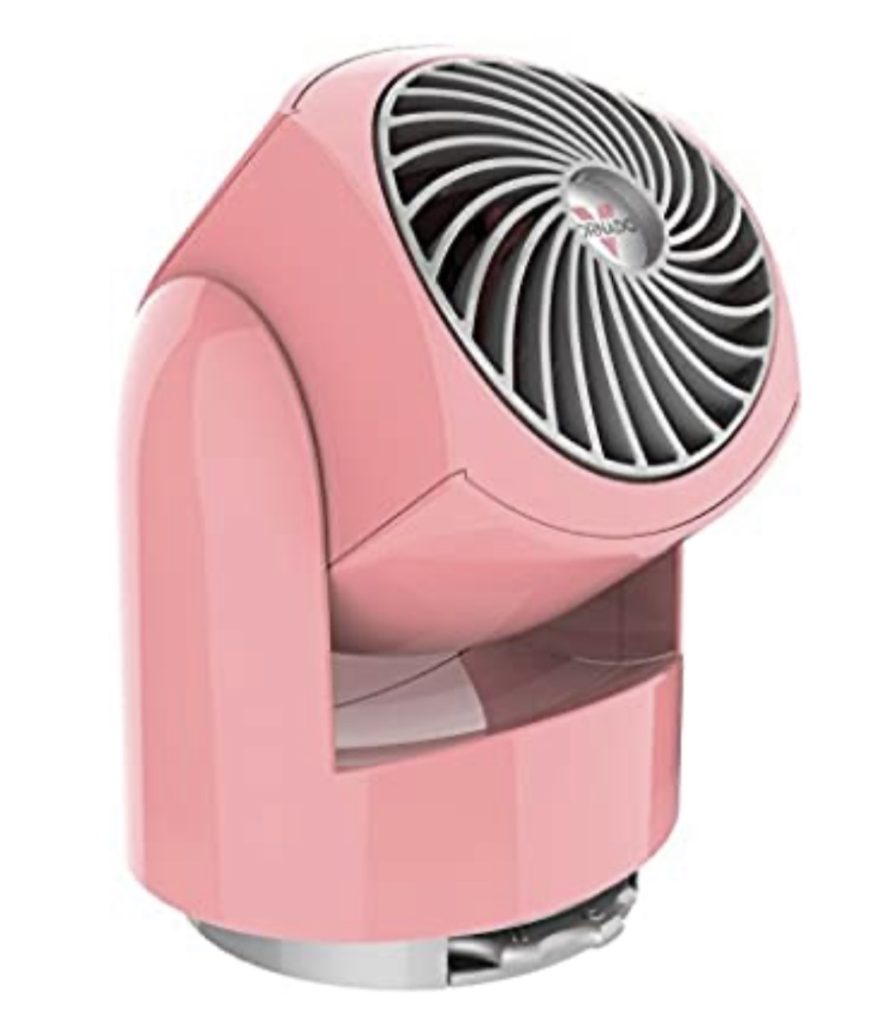
Step 7~ One coat of “Bridge the Ridge” Ridge Filler. Dry in front of fan for 1 minute
Step 8 ~ 1 coat of Gelous Gel Base Coat – Be sure to polish/cap the end of the nail to seal the tip. Dry in front of fan for 2 minutes
Step 9 ~ 1 coat of desired polish color – Be sure to polish/cap the end of the nail to seal the tip. Dry in front of fan for 2 minutes
Step 10 ~ 1 coat of Gelous Gel Base Coat (duplicated from step 8) Be sure to polish/cap the end of the nail to seal the tip. Dry in front of fan for 2 minutes
Step 11 ~ 1 coat of desired polish color – (duplicated from step 9) Be sure to polish/cap the end of the nail to seal the tip. Dry in front of fan for 2 minutes
Step 12 ~ 1 coat of Seche Vite Fast Dry Top Coat. Be sure to polish/cap the end of the nail to seal the tip. Dry in front of fan for 5 minutes
Step 13 ~ 2nd coat of Seche Vite Fast Dry Top Coat. Be sure to polish/cap the end of the nail to seal the tip. Dry in front of fan for 5 minutes
Step 14 ~ Apply Gelish “Nourish” nail oil to cuticles. Or, any oil that you have works great for this step. It’s okay if it runs onto nails.
You’re all set! Take a Nail Selfie and tag me on Instagram 🙂 @upliftedbeautyblog
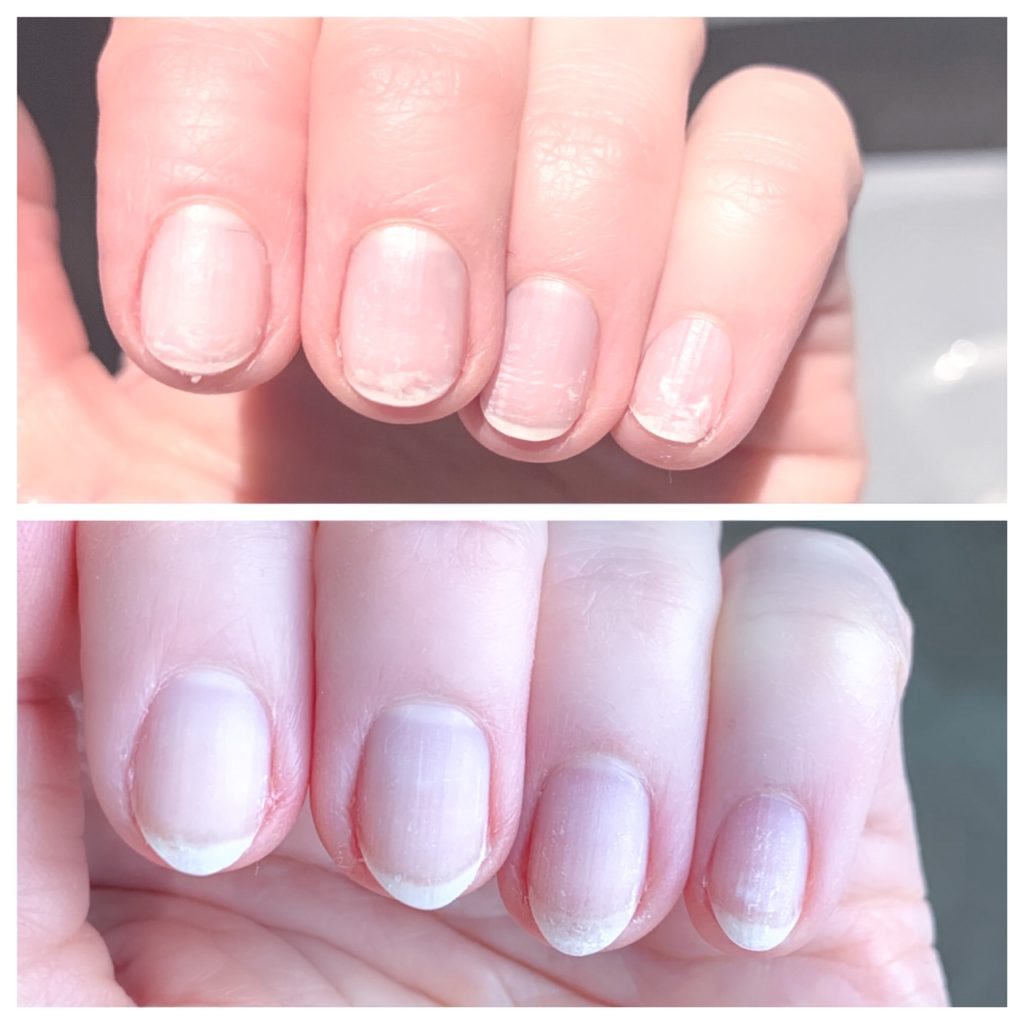
Bottom: 2 months off of gel polish

The information and other content provided in this blog, or in any linked materials, are not intended and should not be construed as medical advice, nor is the information a substitute for professional medical expertise or treatment. You should always consult with a physician prior to starting any therapy or device.
This blog post contains affiliate links. In many cases I earn a small commission for referring business to certain websites I am affiliated with. This is at no cost to you. I will only recommend products & services that I personally use and love. I sincerely appreciate your support, as it helps me to bring the best content to www.UpliftedBeauty.com. Thank you for visiting, Erin